Transfer Gear Inner Bearing: Installation
The work area, counter surfaces and tools must be thoroughly cleaned before attempting to assemble the 948TE transmission. All of the sub assemblies should be disassembled, cleaned, and assembled with new sealing components where applicable. The transmission housing should be clean and oil free before beginning this procedure. If the transmission was contaminated with metallic material, all of the thrust bearings and roller bearings should be replaced. The bearing in the output gear support assembly is not serviceable. The output gear support assembly should be replaced if metal debris is present.
Always wear safety glasses when cleaning, disassembling and assembling the transmission/transaxle. Contents of the transmission/transaxle can become projectiles (e.g., springs, snap-rings, as well as metal and other debris). Failure to wear safety glasses may result in severe personal injury.
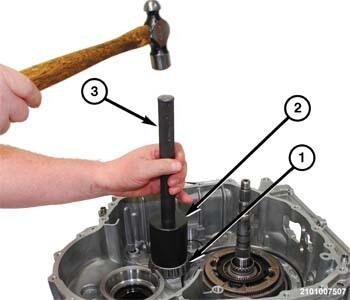
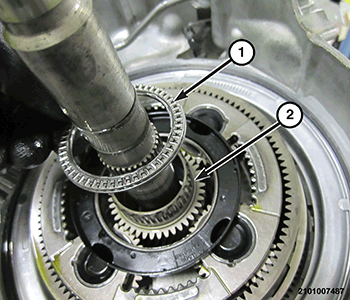
- Using tool (special tool #6888, Installer, Seal) (2) and handle (special tool #C-4171, Driver Handle, Universal) (3), install the transfer gear bearing cone (1) into the transmission housing.
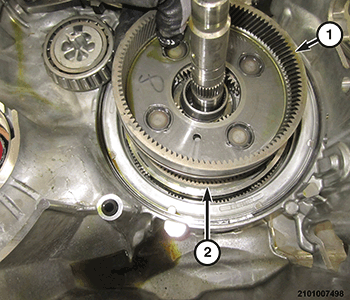
- Install the pinion gear carrier 3 and annulus gear 4 (1) into the annulus gear 3 (2).
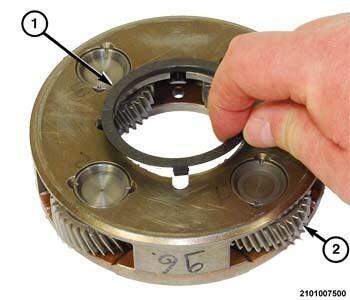
- Install a NEW
thrust spacer (1) on the underside of the pinion gear carrier 4 (2).
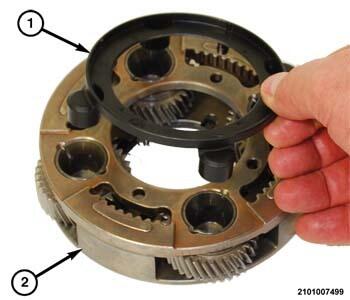
- Install a NEW
thrust spacer (1) on the topside of the pinion gear carrier 4 (2).
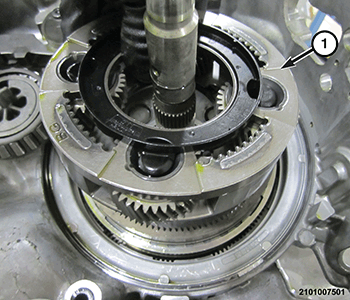
- Install the pinion gear carrier 4 (1) into the annulus gear 4.
- Install the sun gear 3 and 4 and Dog Clutch-F (1) in the gear 4 planetary pinion carrier.
- Install the roller type thrust bearing (1) onto the sun gear 3 and 4 and Dog Clutch-F (2).NOTE:
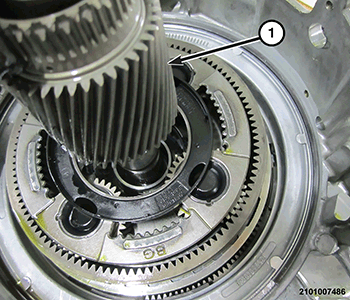
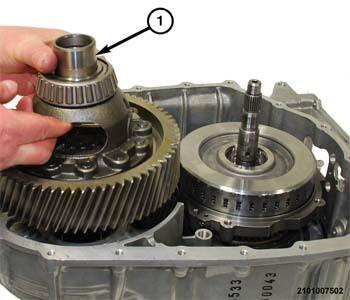
If necessary, replace the bearings and races on the transfer gear (1).
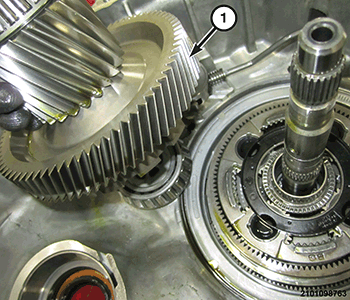
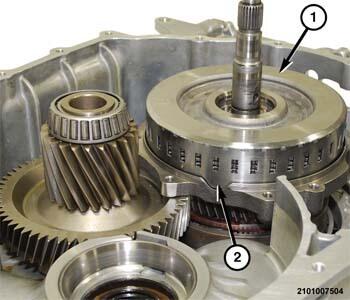
- Install the transfer gear (1) into the transmission housing.
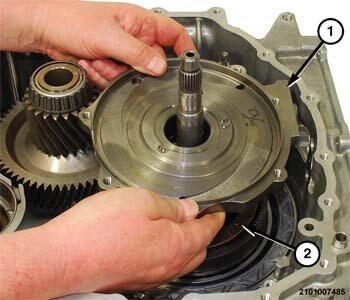
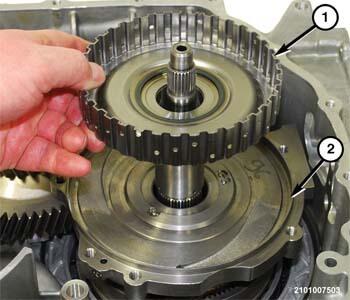
- Install the output gear support (1) onto the pinion gear carrier 4 (2).
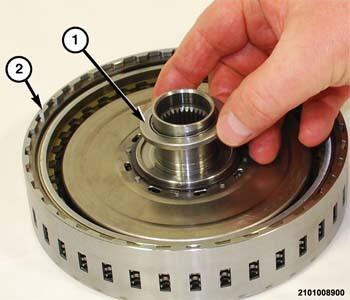
- Install the E-clutch hub (1) in the output gear support (2).
- Install the thrust bearing (1) on the E-clutch (2) assembly.NOTE:
Before installing the E-clutch, use a suitable screwdriver to align the grooves in the friction discs.
- Wriggle the E-clutch (1) until all of the friction discs are fully engaged on the E-clutch hub.NOTE:
When the E-clutch (1) is fully seated the gap (2) will be very small between the E-clutch retainer and the output gear support.
NOTE:If a new differential (1) or transmission housing are being used, measurements must be preformed to determine correct thickness for the bearing preload shims. If the bearings and races are replaced the factory installed preload shims do not require replacement. Refer to STANDARD PROCEDURES .
- If necessary, replace the bearings and races on the differential (1).
- Install the differential assembly (1) into the transmission housing.
- Install the bellhousing. Refer to BELLHOUSING, REMOVAL AND INSTALLATION .
- Install the transmission in the vehicle. Refer to REMOVAL AND INSTALLATION .
- Road test the vehicle to verify the repair.