E-Clutch Assembly
WARNING:
Always wear safety glasses when cleaning, disassembling and assembling the transmission/transaxle. Contents of the transmission/transaxle can become projectiles (e.g., springs, snap-rings, as well as metal and other debris). Failure to wear safety glasses may result in severe personal injury.
NOTE:
Clean the E-clutch components with suitable solvent and blow them dry with regulated 344 kPa (50 psi) shop air. Position all of the E-clutch components on a clean work surface in preparation for assembly. If the seals are damaged in any way clutch piston, retainer and belleville spring retainer will require replacement.
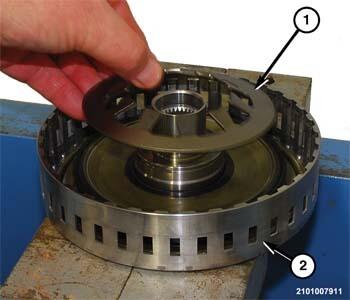
- With clean transmission fluid, lubricate the E-clutch piston (1) where the seal is located and install it into the E-clutch retainer (2).
- Install the belleville spring (1) into the E-clutch retainer (2).
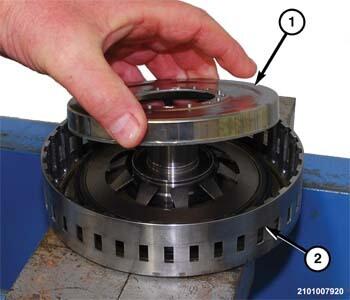
- Install the E-clutch spring retainer (1) into the E-clutch retainer (2).
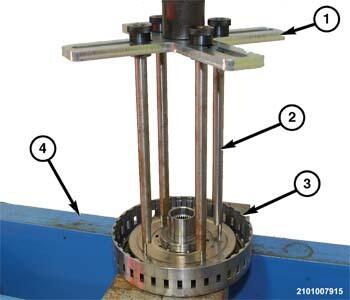
- Using tool (special tool #8901A, Pressing Tool) (with pressure scale removed) (1) and legs (special tool #10428, Adapter, Pressing Tool) (2), compress the E-clutch spring retainer to until snap-ring groove is exposed.
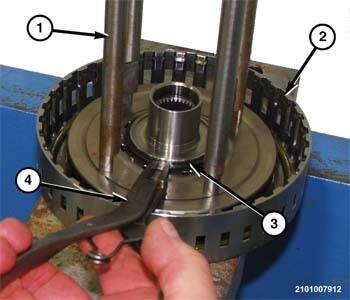
- Using suitable snap-ring pliers (4), install the snap-ring (3) holding the E-clutch spring retainer to the E-clutch retainer (2).
- Remove the tools 8901A and 10428 (1) from the E-clutch retainer (2).
- Place the E-clutch retainer (2) on a suitable clean work surface.
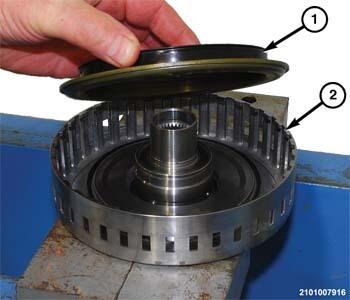
- Install the E-clutch wave spring (1) into the E-clutch retainer.
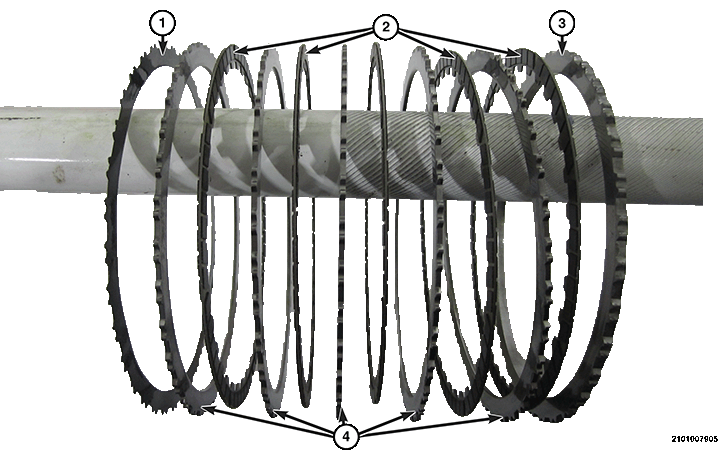
- In alternating sequence, install the E-clutch steel plates (4) and friction plates (2) into the E-clutch retainer.
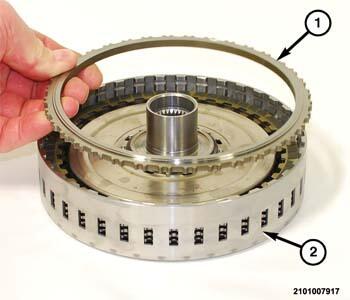
- With stepped side up, install the reaction plate (1) into the E-clutch retainer (2).
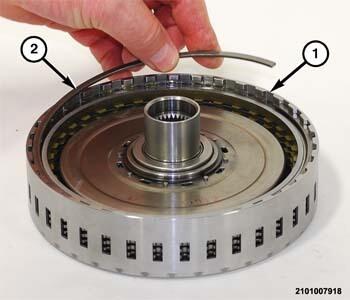
- Install the snap-ring (2) to hold the E-clutch reaction plate in the E-clutch retainer (1).
- Measure the E-clutch end play. Refer to ADJUSTMENTS .