Removal And Installation: Installation
- Carefully install the heater core (2) into the driver side of the air distribution housing.
- Remove the tape or plugs from the heater core tubes and heater core ports.
- Lubricate NEW rubber O-ring seals with clean engine coolant and install them on the heater core tubes. Use only the specified O-ring as they are made of a special material for the engine cooling system.
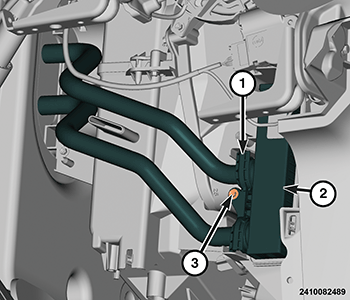
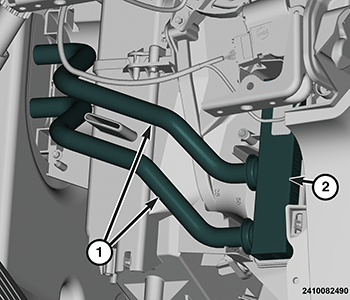
- Connect the heater core tubes (1) to the heater core (2).
- Install the heater core tube clamps (1). Install and tighten the heater core clamp to HVAC housing screw (3).
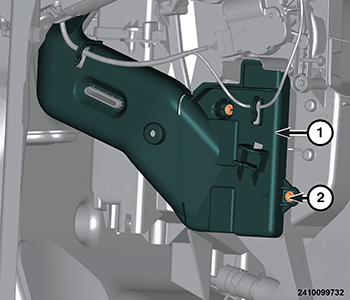
- Flip the heater core cover (1) closed.
- Install and tighten the heater core cover screws (2) to the air distribution housing (1).
- Install the floor distribution duct. Refer to DUCT, FLOOR DISTRIBUTION, REMOVAL AND INSTALLATION .
- Install the knee blocker air bag. Refer to AIR BAG, KNEE BLOCKER, REMOVAL AND INSTALLATION .
- Connect the wire harness connector to the adjustable pedal motor, if equipped.
- Install the steering column opening cover. Refer to COVER, STEERING COLUMN OPENING, REMOVAL AND INSTALLATION .
- Connect the negative battery cable. If equipped with an Intelligent Battery Sensor (IBS), connect the IBS connector.
- If the heater core is being replaced, flush the cooling system. Refer to STANDARD PROCEDURE .
- Fill the engine cooling system. Refer to STANDARD PROCEDURE - FILLING - 3.6L .