Removal And Installation: Removal
WARNING:
Review the safety precautions and warnings in this article before performing this procedure. Failure to follow these instructions may result in serious or fatal injury.
- Disconnect and isolate the negative battery cable. If equipped with an Intelligent Battery Sensor (IBS), disconnect the IBS connector first before disconnecting the negative battery cable.
- Recover the refrigerant from the refrigerant system. Refer to PLUMBING, FRONT, STANDARD PROCEDURE .
- Remove the air cleaner resonator. Refer to RESONATOR, AIR CLEANER, REMOVAL AND INSTALLATION .
- Remove the Bank 1/Solenoid 1 variable valve lift solenoid. Refer to SOLENOID, VARIABLE VALVE LIFT, REMOVAL AND INSTALLATION .
- Remove cylinders 1 and 3 ignition coils. Refer to COIL, IGNITION, REMOVAL AND INSTALLATION .
- Remove the coolant recovery bottle fasteners and position aside with hoses still connected. Refer to BOTTLE, PRESSURIZED COOLANT, REMOVAL AND INSTALLATION
.
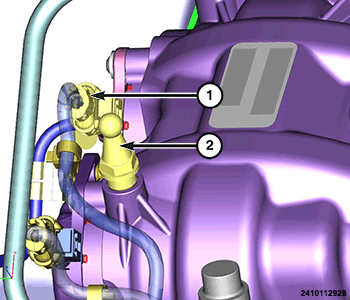
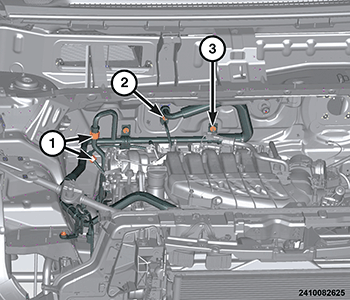
- Remove the fuel vapor tube assembly ball stud (2) and disconnect the cam phaser actuator wire harness connector (1).
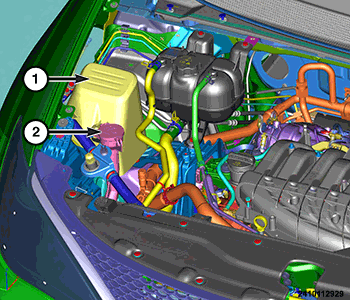
- Remove the Antilock Brake System (ABS) Module cover (1).
- Remove the washer reservoir neck (2).
- Disconnect the ABS Module wire harness connector.
- Remove the right front shock tower brace (1).
- Remove the right front fascia support bracket (2).
- Remove the front engine belly pan. Refer to BELLY PAN, FRONT, REMOVAL AND INSTALLATION .
- Remove the front belly pan. Refer to BELLY PAN, FRONT, REMOVAL AND INSTALLATION
.
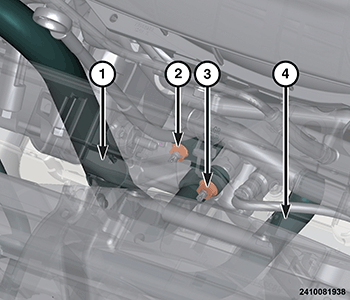
- Disconnect the A/C suction line (1, 3) from the A/C compressor, then remove and discard
the O-ring seal and gasket.
- Disconnect the A/C liquid line (3, 4) from the A/C condenser, then remove and discard the O-ring seal and gasket.
- Remove the support and lower the vehicle.
- Remove the right engine insulator. Refer to INSULATOR, ENGINE MOUNT, RIGHT, REMOVAL AND INSTALLATION
.
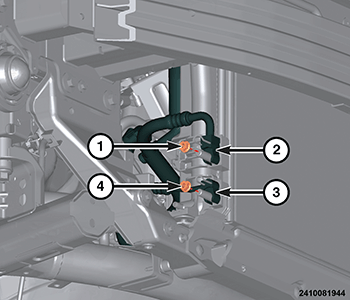
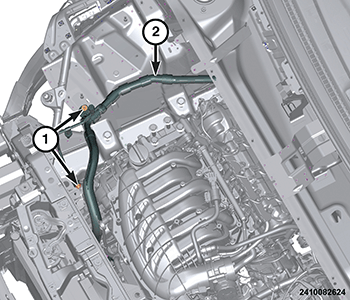
- On models equipped with the Heating, Ventilation and Air Conditioning, Rear (HVACR) system, loosen the extension line fitting nuts (1), disconnect the A/C suction and liquid extension line from the assembly.
- Remove the A/C line assembly to front expansion valve nut (2) and discard the O-rings and gasket.
- Remove the two A/C line assembly to bulkhead nuts (3)
- Remove the two A/C line assembly to body fasteners (1).
- Remove the A/C line assembly (2) from the engine compartment.
- Install plugs in or tape over all the opened refrigerant line fittings and the compressor and expansion valve ports.