Removal And Installation: Removal
Disable the airbag system before attempting any steering wheel, steering column, or instrument panel component diagnosis or service. Disconnect and isolate the negative battery (ground) cable, then wait two minutes for the airbag system capacitor to discharge before performing further diagnosis or service. This is the only sure way to disable the airbag system. Failure to take the proper precautions may result in accidental airbag deployment and possible serious or fatal injury.
Review the warnings and cautions for this system before performing the procedure. Failure to follow these instructions may result in serious or fatal injury.
- Drain the engine cooling system. Refer to STANDARD PROCEDURE .
- Disconnect and isolate the negative battery cable. If equipped with an Intelligent Battery Sensor (IBS), disconnect the IBS connector first before disconnecting the negative battery cable.
- Remove the steering column opening cover. Refer to COVER, STEERING COLUMN OPENING, REMOVAL AND INSTALLATION .
- Disconnect the wire harness connector from the adjustable pedal motor, if equipped.
- Remove the knee blocker air bag and bracket. Refer to AIR BAG, KNEE BLOCKER, REMOVAL AND INSTALLATION .
- Remove the floor distribution duct. Refer to DUCT, FLOOR DISTRIBUTION, REMOVAL AND INSTALLATION .
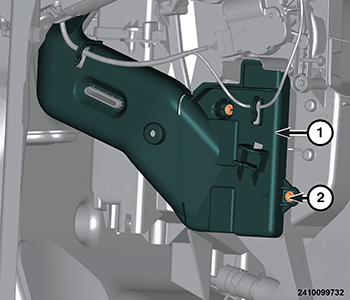
- Remove the screws (2) that secure the heater core cover (1) to the left side of the air distribution housing.
- Flip the open the heater core cover (1) to access the heater core fittings.NOTE:
Heater core cover only removed for clarity.
NOTE:Take proper precautions to protect the carpeting from engine coolant. Have absorbent toweling readily available to clean up any spills.
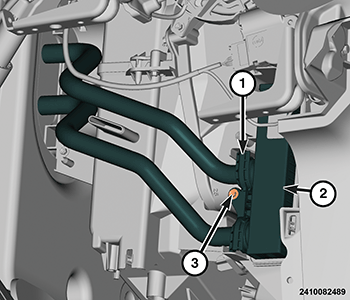
- Remove the heater core clamp to HVAC housing screw (3) and remove the clamps (1) that secure the heater tubes to the heater core (2).
- Disconnect the heater core tubes (1) from the heater core (2) and remove and DISCARD the O-ring seals.
- Install plugs in, or tape over the opened heater core tubes and heater core ports.NOTE:
If the foam seal around the heater core is deformed or damaged, it must be replaced.
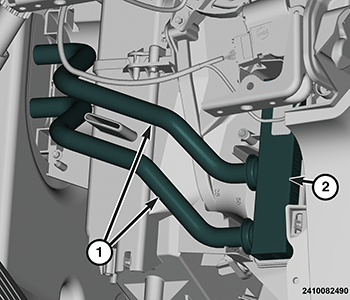
- Carefully pull the heater core (2) out of the driver side of the air distribution housing.