Diagnosis And Testing
- Raise and support the vehicle. Refer to HOISTING, STANDARD PROCEDURE .
- Remove the tire and wheel assembly. Refer to REMOVAL AND INSTALLATION
.
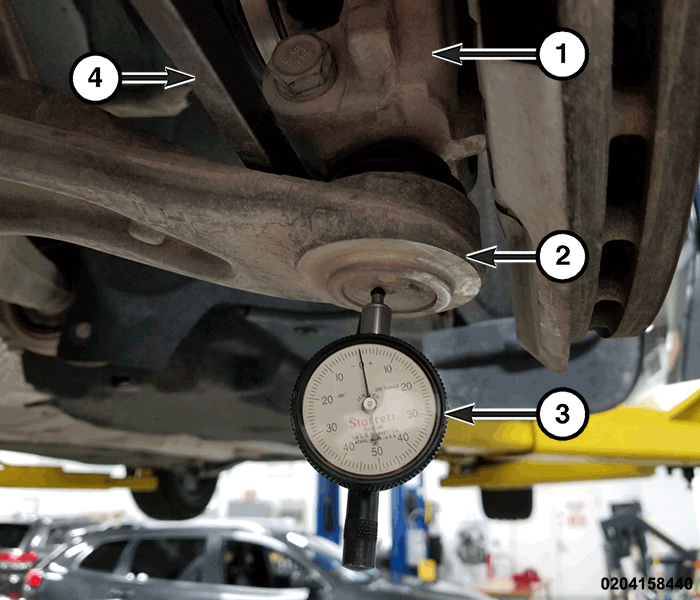
- Using Dial Indicator (special tool #C-3339A, Set, Dial Indicator) (3), or equivalent, attach the dial indicator mount to the steering knuckle (1) and align the dial indicator's plunger with the direction of the ball joint stud axis, touching the end of the ball joint in the lower control arm (2).
- Push up on the lower control arm (2) and zero the dial indicator (3).NOTE:
Use care when applying load to the knuckle (1) as to avoid damaging the ball joint seal boot.
- From the front of the vehicle, insert a pry bar (4) between the steering knuckle (1) and the lower control arm (2). Use lever principle to pry the steering knuckle (1) up from the lower control arm (2). Apply the load until the needle of the dial indicator no longer moves.
- Record the ball joint movement. The end play is acceptable if no more than 1.0 mm (0.039 in.) of end play is achieved back-to-back.
- Perform this procedure on each side of the vehicle as necessary.