Without HVAC Housing: Installation
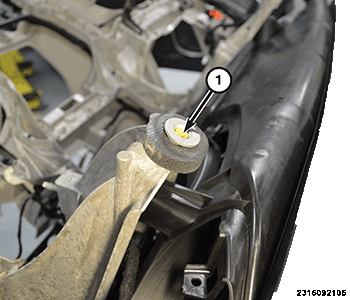
- Verify that the two bushings (1) are fully screwed in and rotate freely.NOTE:
Inspect the bushings and replace if necessary.
- Position the instrument panel (I/P) into the vehicle and connect the wire harness connector to the Heating Ventilation and Air Conditioning (HVAC) housing.NOTE:
Make sure that all wiring harnesses are routed properly and are not pinched when installing the instrument panel.
- Verify that the HVAC housing is aligned properly with the mounting holes to the structure.
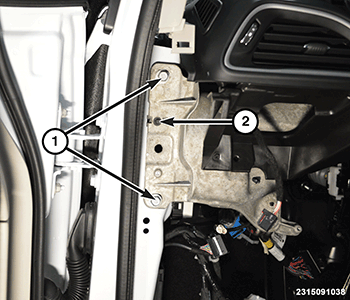
- Install the instrument panel carrier bolts (1) on both sides of the vehicle and tighten to the proper torque specifications. Refer to TECHNICAL SPECIFICATIONS .
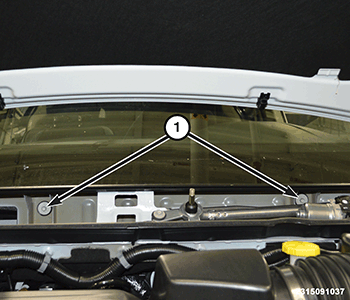
- Install the instrument panel dash bolts (1) on both sides of the vehicle and tighten to the proper torque specifications. Refer to TECHNICAL SPECIFICATIONS .
- Connect the wire harness connectors (2) at the A-pillars, on both side of the vehicle.
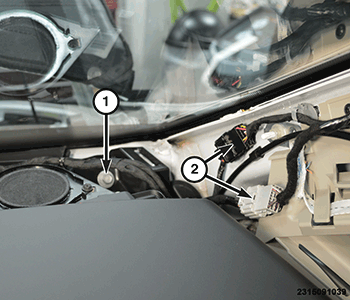
- Install the instrument panel cowl bolts (1), under the cowl cover panel and tighten to the proper torque specifications. Refer to TECHNICAL SPECIFICATIONS .
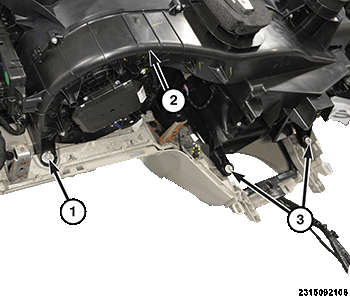
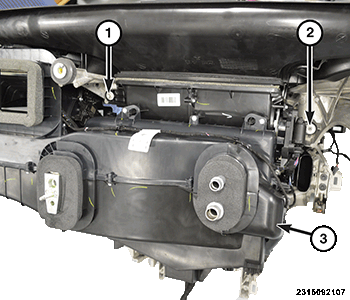
- Install the nut (1), on the passenger side below the glove box opening, that fastens the HVAC housing (2) to the support structure. Tighten the nut securely.NOTE:
This is shown in illustration with the I/P removed for better clarity.
- Install the two bolts (3), behind the storage bin opening, that fastens the HVAC housing to the support structure. Tighten the bolts securely.
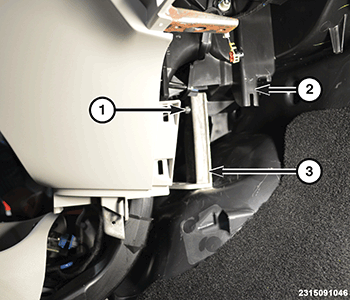
- Reach up high under the I/P on the passenger side and install the bolt (1) that fastens the HVAC housing (3) to the support structure. Tighten the bolt securely.NOTE:
This is shown in illustration with the I/P removed for better clarity.
- Reach up under the I/P on the driver side, to the right of the steering column, and install the bolt (2) that fastens the HVAC housing to the support structure. Tighten the bolt securely.
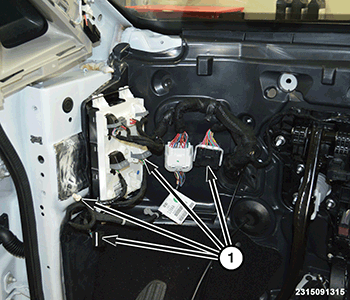
- Under the left side of the I/P connect the wire harness connectors (1).NOTE:
This is shown in illustration with the I/P removed for better clarity.
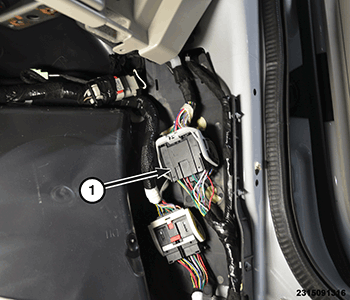
- Under the right side of the I/P connect the wire harness connector (1). If equipped with rear entertainment, connect the USB connectors in this location also.
- Remove the I/P support bracket (3) from the temporary location on the HVAC housing (2).
- Install the I/P support bracket (2) and tighten securely.
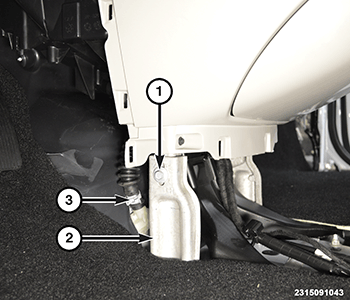
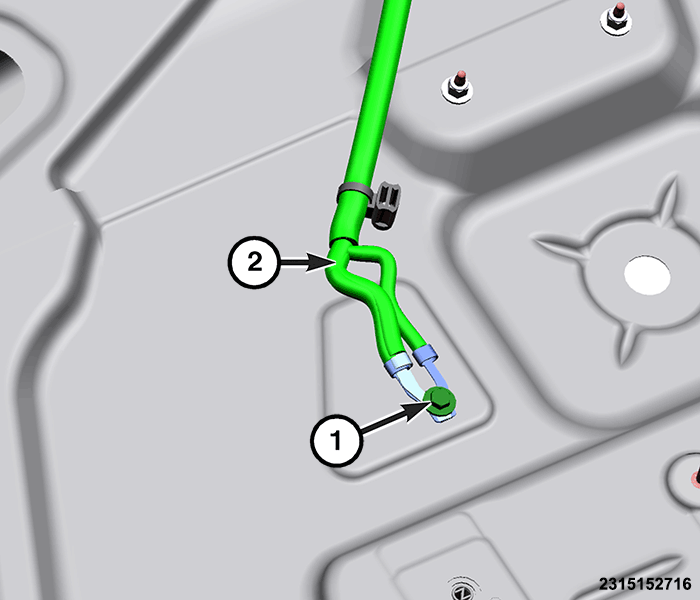
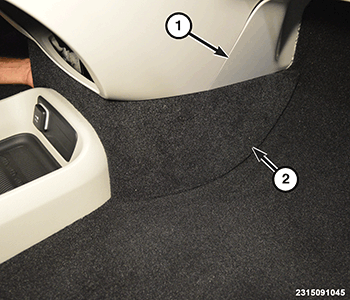
- Pull the passenger side floor carpet (1) back, then route grounding wires and install the nuts (2). Clip the wire harness to the body.
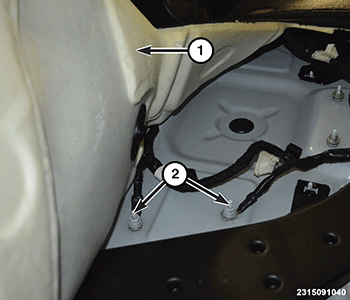
- Pull the driver side floor carpet back, then route grounding wires and install the bolt (1). Clip the wire harness (2) to the body. If the driver seat was removed, install the driver seat. Refer to SEAT, FRONT, REMOVAL AND INSTALLATION or SEAT, STOW-N-GO, REMOVAL AND INSTALLATION or SEAT, REMOVAL AND INSTALLATION or SEAT, REMOVAL AND INSTALLATION .
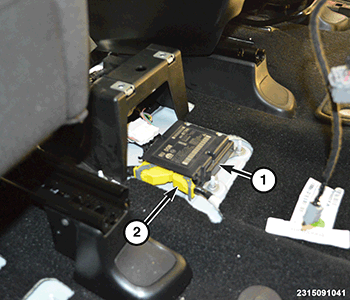
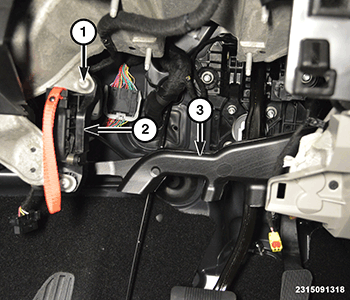
- Connect the front wire harness connector (2) to the air bag module (1).
- Install the manual park release lever (2) and the two bolts (1). Tighten the bolts securely.
- Install the drivers side floor duct (3) and the two fasteners.
- Install the drivers knee blocker air bag. Refer to AIR BAG, KNEE BLOCKER, REMOVAL AND INSTALLATION .
- Install the steering column. Refer to COLUMN, REMOVAL AND INSTALLATION
.
- Install the I/P trim panels (1) and (2).
- Install both A-pillar trim panels. Refer to PANEL, A-PILLAR TRIM, REMOVAL AND INSTALLATION .
- Install the defroster grill. Refer to GRILLE, DEFROSTER, REMOVAL AND INSTALLATION .
- Install the floor console. Refer to CONSOLE, FLOOR, REMOVAL AND INSTALLATION .
- Install the cowl cover panel. Refer to COVER, COWL PANEL, REMOVAL AND INSTALLATION .