Glass Preparation - Installing A Previously Installed Liftgate Glass
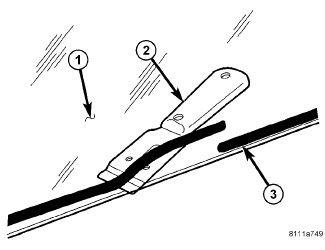
| 1 - WINDSHIELD |
| 2 - SCRAPER |
| 3 - OLD ADHESIVE |
- Before proceeding with the following repair procedure, review all warnings and cautions. Refer to STATIONARY GLASS, WARNING .
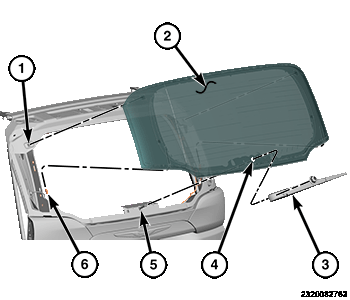
- Level old bead of liftgate glass adhesive (3) to a thickness of approximately 1 mm (0.04 in.) and remove loose adhesive.
- Position the liftgate glass over the wiper shaft (5) and onto the liftgate.
- Position liftgate glass in center of liftgate opening and resting on the guide pins (1).
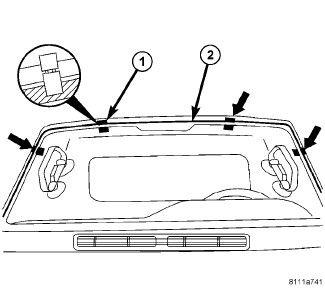
1 - TAPE 2 - WINDSHIELD FRAME - Apply adhesive tape strips (1) around the perimeter of the liftgate opening to aid in installation.NOTE:
Windshield installation shown in illustration, liftgate glass similar.
- Verify the liftgate glass gap is parallel with the liftgate opening.
- Cut tape with a sharp knife and remove liftgate glass.
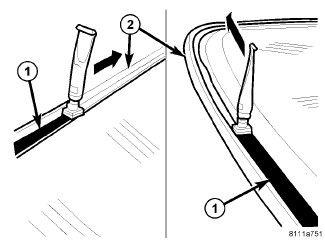
1 - PRIMER 2 - WINDSHIELD SEAL NOTE:Typical primer installation shown in illustration.
- Clean and dry area of glass (2) to be re-glued with a suitable glass preparation solvent and rag.
- Using a flash light, verify that glass primer is without damage.
- Re-prime any damaged area. If old adhesive has been exposed for more than 12 hours, entire adhesive area needs to be re-primed.
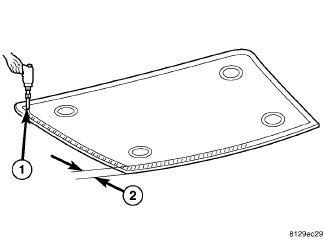
- Apply primer (1) around the perimeter of the glass to a width of 15 mm (0.5 in.) (2).
- Allow primer to air dry for at least 10 minutes.
- Using a flash light, verify that glass primer is without damage.