Lamp - Rear Side Marker
REMOVAL
NOTE:
A side marker lamp is integral to the rear fascia behind each rear wheel opening.
- Disconnect and isolate the negative battery cable. If equipped with an Intelligent Battery Sensor (IBS), disconnect the IBS connector first before disconnecting the negative battery cable.
- Remove enough of the fasteners that secure the rear wheel house splash shield to the rear fascia to gain access to the back of the side marker lamp housing. Refer to SHIELD, SPLASH, REAR WHEELHOUSE, REMOVAL AND INSTALLATION
.
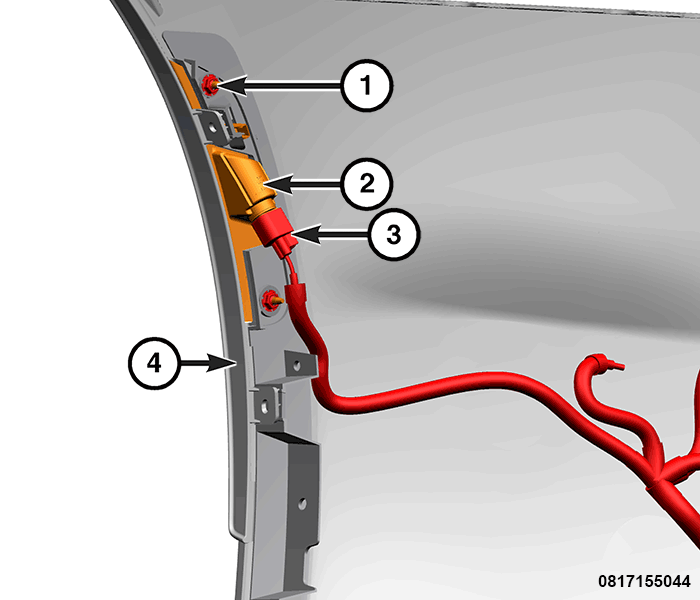
- Disconnect the wire harness connector (3) from the side marker lamp (2).
- Remove the fasteners (1) that secure the lamp housing to the rear fascia (4).
- Release the locking tab (1) and remove the side marker lamp (2) from the front fascia (3).

INSTALLATION
- Position the side marker lamp onto the fascia.
- Install and tighten the fasteners that secure the lamp housing to the fascia. Tighten the fasteners securely.
- Connect the wire harness connector to the side marker lamp socket.
- Install the removed fasteners that secure the rear wheel house splash shield to the rear fascia. Refer to SHIELD, SPLASH, REAR WHEELHOUSE, REMOVAL AND INSTALLATION .
- Connect the negative battery cable. If equipped with an Intelligent Battery Sensor (IBS), connect the IBS connector.