Main Control Cover - 3.5L Ti-VCT: Installation
- 2.
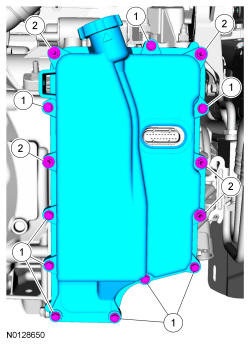
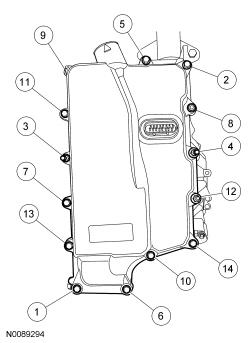
Install the main control cover and loosely install the 14 bolts.- 1.
Bolt location
- 2.
Stud bolt location
- 1.
NOTE:
Install the stud bolts in the locations noted during disassembly.
NOTE:
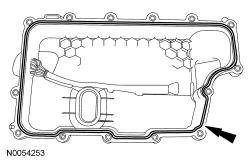
Inspect the 20-pin solenoid body connector seal and make sure the seal is on the solenoid body connector or a transmission fluid leak will occur resulting in transmission damage.
- 4.
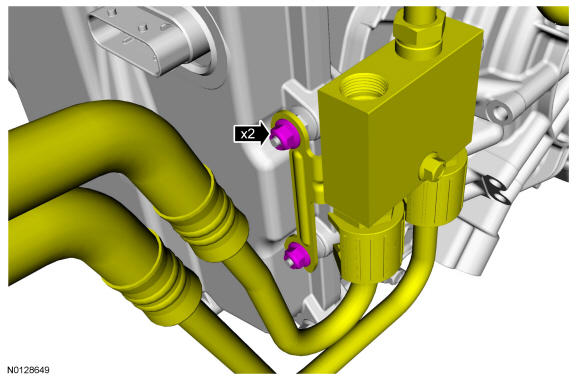
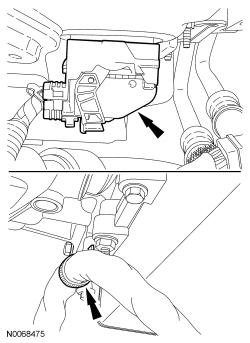
Position the transmission fluid cooler thermal bypass valve and transmission fluid cooler assembly in place and install the 2 transmission fluid cooler thermal bypass valve nuts.- Tighten to 9 Nm (80 lb-in).
- 5.
Install the ground strap and nut on the main control cover stud bolt.- Tighten to 11 Nm (97 lb-in).
- 6.
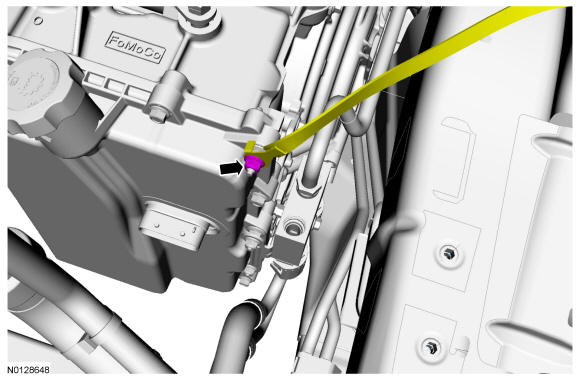
Connect the transmission electrical connector and install the wiring harness fastener on the main control cover stud.
- 7.
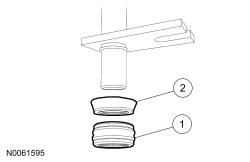
Inspect the transmission mounted transmission fluid cooler tube backing ring and seal for damage and install a new backing ring or seal if necessary. Lubricate the transmission mounted transmission fluid cooler tube seal with clean Motorcraft ®MERCON ® LV Automatic Transmission Fluid and install the backing ring and seal on the transmission mounted transmission fluid cooler tube.Item Service Part Number Description 1 7D285 Seal 2 7J324 Backing ring
- 8.
Position the transmission mounted transmission fluid cooler tube in place and install a new transmission mounted transmission fluid cooler tube bolt.- Tighten to 9 Nm (80 lb-in).
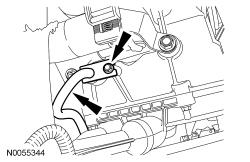
- 9.
Tighten the transmission mounted transmission fluid cooler tube fitting.- Tighten to 25 Nm (18 lb-ft).

- 10.
Install the ACL assembly and outlet pipe. REFER to Intake Air Distribution and Filtering .
- 11.
Fill with clean Motorcraft ®MERCON ® LV Automatic Transmission Fluid. Refer to Transmission Fluid Drain and Refill .