Removal And Installation: Transmission: Removal
WARNING: This page is about a different variant/trim than selected.
- 1.
With the vehicle in NEUTRAL, position it on a hoist. REFER to Jacking and Lifting , Lifting Points.
- 2.
Remove the ACL assembly and outlet pipe. REFER to Intake Air Distribution and Filtering .
- 3.
Remove the battery tray. REFER to Battery, Mounting and Cables .
- 4.
Disconnect the selector lever cable end from the manual control lever, remove the bracket bolts and position aside the selector lever cable and bracket.

- 8.
Remove the starter. REFER to Starting System .
- 10.
Remove and discard the torque converter nuts.
NOTE:
Index mark one stud and the flexplate for assembly reference.
NOTE:
Only rotate the engine in a clockwise direction or engine damage will occur.
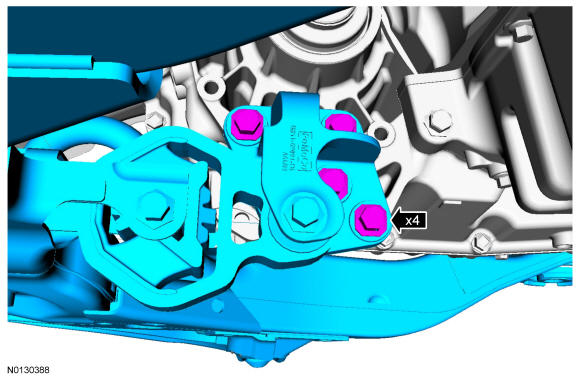
- 11.
Remove the front subframe. REFER to Uni-Body, Subframe and Mounting System . When removing the front subframe, it is not necessary to remove the roll restrictor through bolt. Remove the roll restrictor bracket bolts and the roll restrictor bracket from the transmission.
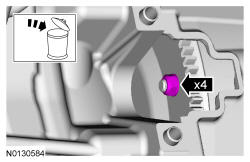
- 12.
Remove the drain plug and drain the transmission. Install the drain plug.- Torque: 12 Nm (106 lb-in).
NOTE:
If transmission disassembly or installation of a new transmission is necessary, drain the transmission fluid.
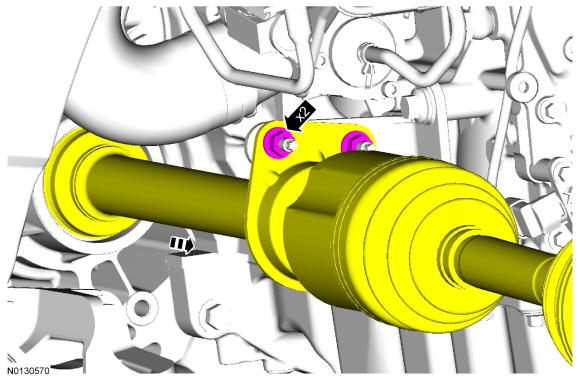
- 13.
Remove the halfshaft bracket nuts and slide the RH halfshaft assembly out of the transmission.- Position the halfshaft aside and support with a length of mechanics wire.
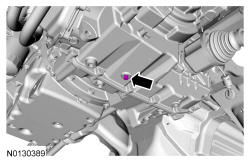
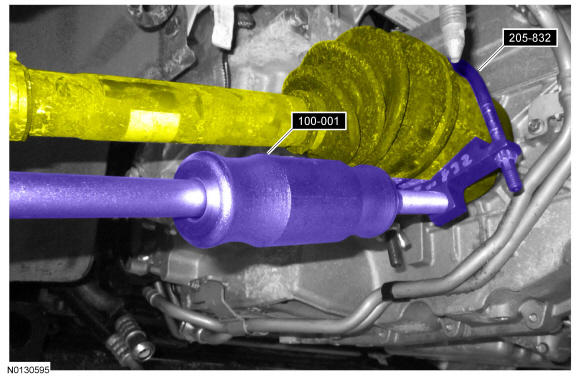
- 14.
Using 205-832 and 100-001 T50T-100-A, separate the halfshaft from the transmission.- Position the halfshaft aside and support with a length of mechanics wire.
- 15.
Remove the catalytic converter. REFER to Exhaust System .
- 17.
Remove the cowl panel. REFER to Front End Body Panels .
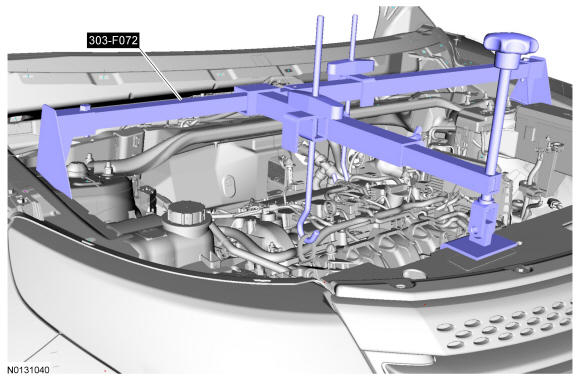
- 19.
Remove the transmission support insulator bolt and lower the transmission enough for the transmission support insulator bracket to clear the transmission support insulator.
- 20.
Disconnect the transmission main electrical connector and remove the wiring retainer from the transmission fluid thermal bypass valve bracket.
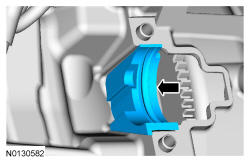
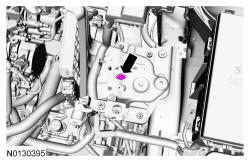
- 21.
Disconnect the TSS sensor electrical connector and remove wiring retainer from the transmission fluid thermal bypass valve bracket.
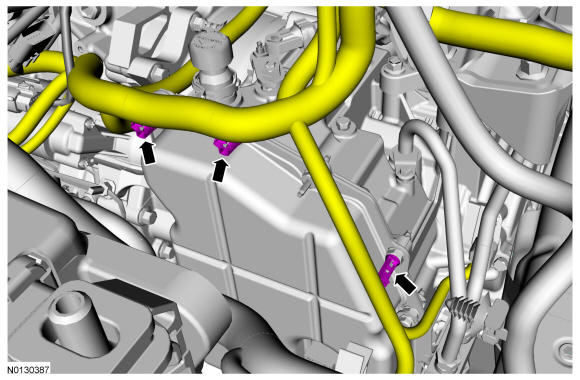
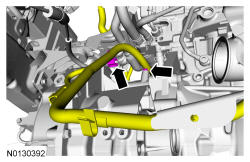
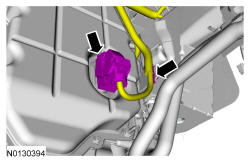
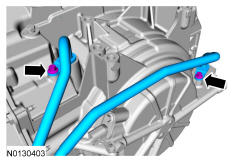
- 22.
Remove the secondary latches from the transmission fluid cooler tubes at the transmission fluid thermal bypass valve.
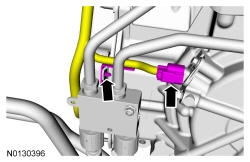
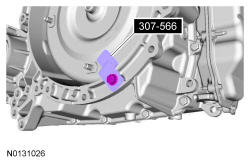
- 23.
Using 307-569, disconnect the transmission fluid cooler tubes from the transmission fluid cooler thermal bypass valve.

- 24.
Support the transmission with a transmission jack. Secure the transmission to the transmission jack with a safety strap.
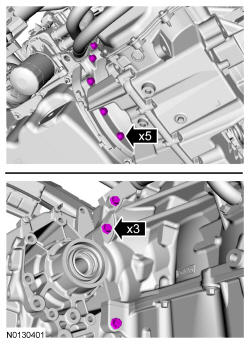
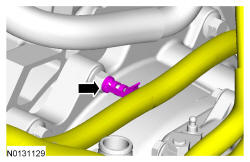
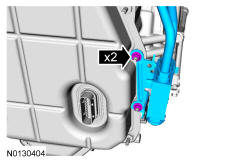
- 28.
Remove and discard the transmission fluid cooler tube bolts.
NOTE:
It is only necessary to remove the transmission mounted transmission fluid cooler tubes if the transmission is being overhauled or replaced. If the transmission is being removed for access to other components only, it is not necessary to remove the transmission mounted transmission fluid cooler tubes.
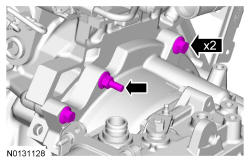
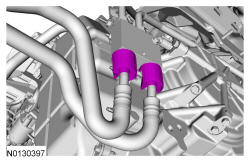
- 29.
Remove the nuts, the transmission fluid cooler thermal bypass valve and the transmission fluid cooler tubes from the transmission.
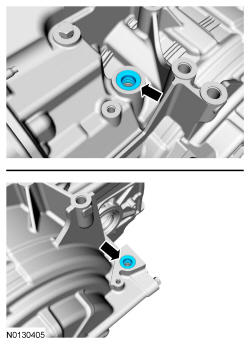
- 30.
Inspect the transmission case to be sure that the transmission fluid cooler tube seals and backing rings were removed with the transmission fluid cooler tubes and are not stuck in the transmission case. If the transmission fluid cooler tube seals or backing rings are stuck in the transmission case, remove the seals and backing rings.
- 31.
If the transmission is to be overhauled or if installing a new or re-manufactured transmission, carry out the transmission fluid cooler backflushing and cleaning. REFER to Transaxle Transmission Cooling .