Oil Pan: Removal
WARNING:
Before beginning any service procedure in this article, refer to Safety Warnings in SERVICE INFORMATION
.
NOTE:
During engine repair procedures, cleanliness is extremely important. Any foreign material, including any material created while cleaning gasket surfaces that enters the oil passages, coolant passages or the oil pan, can cause engine failure.
- 1.
With the vehicle in NEUTRAL, position it on a hoist. REFER to Jacking and Lifting .
- 2.
Remove the ACL tray assembly and ACL outlet pipe. REFER to Intake Air Distribution and Filtering .
- 3.
Remove the battery tray. REFER to Battery, Mounting and Cables .
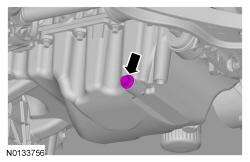
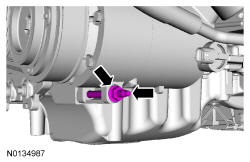
- 8.
Remove the drain plug and drain the engine oil and re-install the drain plug.- Tighten to 27 Nm (20 lb-ft).
- 10.
Remove the exhaust Y-pipe. REFER to Exhaust System .
- 11.
Remove the transaxle support insulator - anti-roll. For FWD vehicles, REFER to Automatic Transmission 6F50 6F55 or for AWD vehicles, REFER to Automatic Transmission 6F50 6F55 .
- 12.
If equipped with AWD, remove the catalytic converter - RH manifold. REFER to Exhaust System .
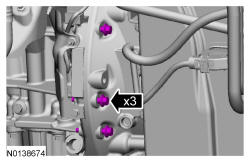
- 14.
Remove the A/C compressor nut and stud.
NOTE:
It may be necessary to roll the bottom of the engine back for the A/C compressor stud to clear the subframe.
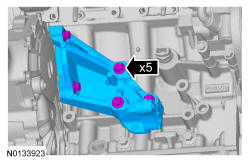
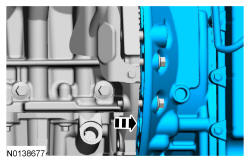
- 16.
Loosen the RH engine-to-bellhousing bolt 5 mm (0.20 in).
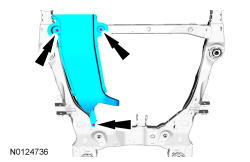
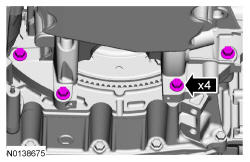
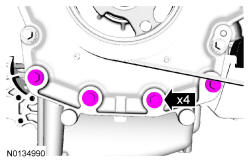
NOTE:
AWD vehicle shown, FWD similar. Parts removed from graphic for clarity.
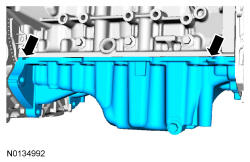
- 23.
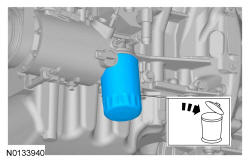
Clean the engine oil pan using a 3M Roloc ® Bristle Disk (2-in white, part number 07528) in a suitable tool turning at the recommended speed of 15, 000 RPM. Thoroughly wash the oil pan to remove any foreign material, including any abrasive particles created during the cleaning process.
NOTE:
Only use a 3M Roloc ® Bristle Disk (2-in white, part number 07528) to clean the oil pan. Do not use metal scrapers, wire brushes or any other power abrasive disk to clean. These tools cause scratches and gouges that make leak paths.
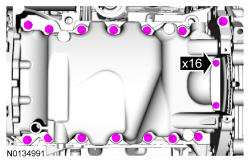
- 24.
Clean the sealing surfaces of the cylinder block and engine front cover in the following sequence.- Remove any large deposits of silicone or gasket material.
- Apply silicone gasket remover and allow to set for several minutes.
- Remove the silicone gasket remover. A second application of silicone gasket remover may be required if residual traces of silicone or gasket material remain.
- Apply Motorcraft ® Metal Surface Prep to remove any remaining traces of oil and to prepare the surfaces to bond. Do not attempt to make the metal shiny. Some staining of the metal surfaces is normal.
NOTE:
Do not use wire brushes, power abrasive discs or 3M Roloc ® Bristle Disk (2-in white, part number 07528) to clean the sealing surfaces. These tools cause scratches and gouges that make leak paths. They also cause contamination that causes premature engine failure. Remove all traces of the gasket.