Engine Front Cover: Removal
WARNING: This page is about a different variant/trim than selected.
NOTE:
Do not loosen or remove the crankshaft pulley bolt without first installing the special tools as instructed in this procedure. The crankshaft pulley and the crankshaft timing sprocket are not keyed to the crankshaft. The crankshaft, the crankshaft sprocket and the pulley are fitted together by friction, using diamond washers between the flange faces on each part. For that reason, the crankshaft sprocket is also unfastened if the pulley bolt is loosened. Before any repair requiring loosening or removal of the crankshaft pulley bolt, the crankshaft and camshafts must be locked in place by the special service tools, otherwise severe engine damage can occur.
NOTE:
During engine repair procedures, cleanliness is extremely important. Any foreign material, including any material created while cleaning gasket surfaces, that enters the oil passages, coolant passages or the oil pan can cause engine failure.
- 1.
With the vehicle in NEUTRAL, position it on a hoist. REFER to Jacking and Lifting
- 2.
Remove the CAC inlet tube. REFER to Intake Air Distribution and Filtering .
- 4.
Remove the crankshaft front seal. Refer to Crankshaft Front Seal .
- 6.
Remove the engine mount. Refer to Engine Mount .
- 8.
Remove the nut and the ground strap.- Detach the 2 wiring harness retainers from the engine front cover.
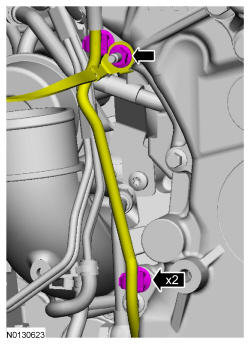
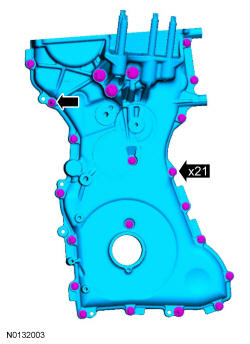
- 9.
Remove the 21 bolts, the stud bolt and the engine front cover.- Clean and inspect the mounting surfaces of the engine and the front cover.
NOTE:
Do not use metal scrapers, wire brushes, power abrasive disks or other abrasive means to clean sealing surfaces. These tools cause scratches and gouges which make leak paths.