Oil Pan: Installation
WARNING: This page is about a different variant/trim than selected.
- 1.
Clean and inspect all mating surfaces.
NOTE:
Do not use metal scrapers, wire brushes, power abrasive discs or other abrasive means to clean the sealing surfaces. These tools cause scratches and gouges, which make leak paths. Use a plastic scraping tool to remove traces of sealant.
- 2.
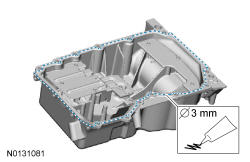
Apply a 3 mm (0.118 in) bead of Silicone Gasket and Sealant to the oil pan-to-engine block and to the oil pan-to-engine front cover mating surface.
NOTE:
If the oil pan is not secured within 10 minutes of sealant application, the sealant must be removed and the sealing area cleaned with Motorcraft ® Metal Surface Prep. Allow to dry until there is no sign of wetness, or 10 minutes, whichever is longer. Failure to follow this procedure can cause future oil leakage.
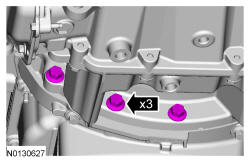
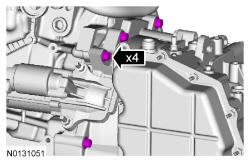
- 4.
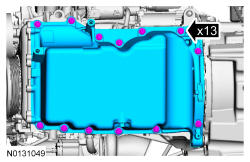
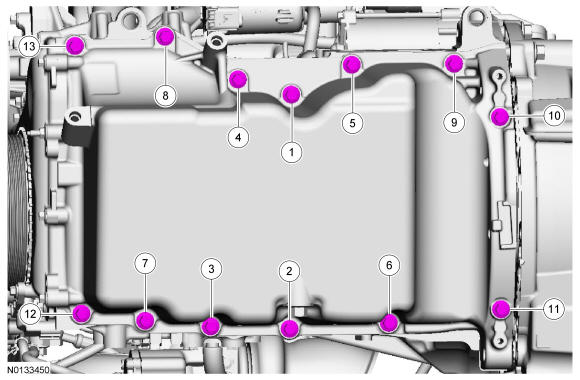
Install the 4 engine front cover-to-oil pan fasteners.- Tighten to 10 Nm (89 lb-in).
NOTE:
The engine front cover-to-oil pan fasteners must be tightened first to align the front surface of the oil pan flush with the front surface of the engine block.

- 6.
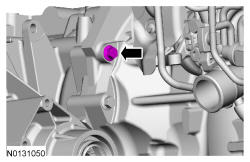
Alternate tightening the LH bellhousing-to-engine and RH engine-to-bellhousing lower bolts to draw the transaxle and engine together.- Tighten to 48 Nm (35 lb-ft).
- 10.
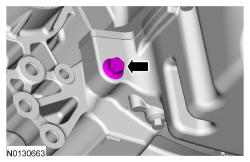
Install the A/C compressor, the 2 bolts and the stud.- Tighten the bolts to 25 Nm (18 lb-ft) and the stud to 9 Nm (80 lb-in).
- Install the nut and tighten to 25 Nm (18 lb-ft).
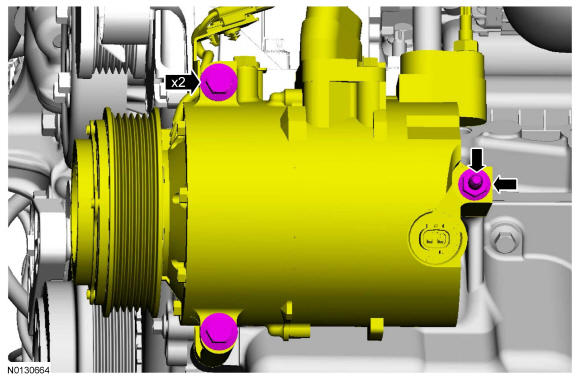
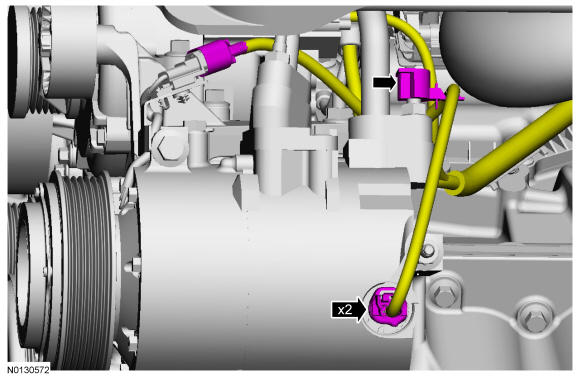
- 11.
Connect the 2 A/C compressor electrical connectors.- Attach the wiring harness retainer to the A/C tube stud bolt.
- 12.
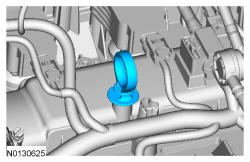
Install the A/C drive belt. REFER to Accessory Drive .
- 13.
Install the catalytic converter. REFER to Exhaust System .
- 14.
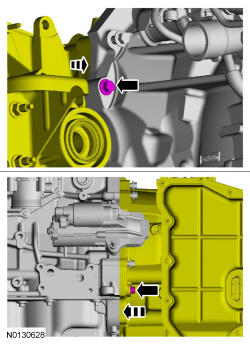
Install the engine roll restrictor. REFER to Automatic Transmission 6F35 .
- 16.
Install the engine ACL and ACL outlet pipe assembly. REFER to Intake Air Distribution and Filtering .