Fuel Injection Pump: Installation
WARNING: This page is about a different variant/trim than selected.
WARNING:
Before beginning any service procedure in this service information, refer to SAFETY WARNINGS
WARNING:
Before working on or disconnecting any of the fuel tubes or fuel system components, relieve the fuel system pressure to prevent accidental spraying of fuel. Fuel in the fuel system remains under high pressure, even when the engine is not running. Failure to follow this instruction may result in serious personal injury.
WARNING:
Clean all fuel residue from the engine compartment. If not removed, fuel residue may ignite when the engine is returned to operation. Failure to follow this instruction may result in serious personal injury.
NOTE:
Do not loosen any fittings or plugs on the fuel injection pump.
- 1.NOTE: The cam lobe for the fuel injection pump must be at BDC for the fuel injection pump installation.
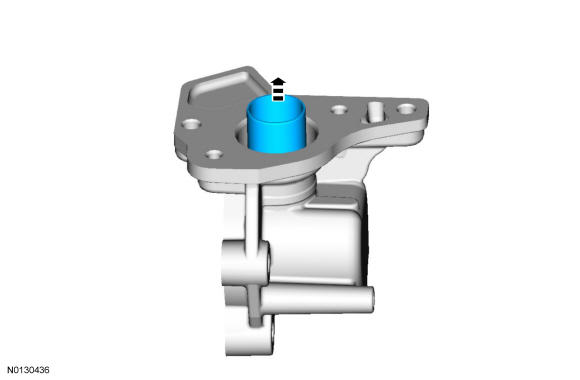
- 2.
Refer to Fuel Injection Pump Tappet Inspection .
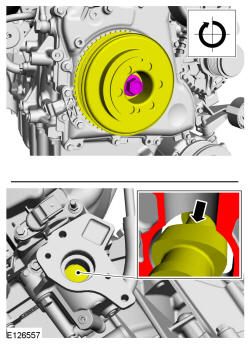
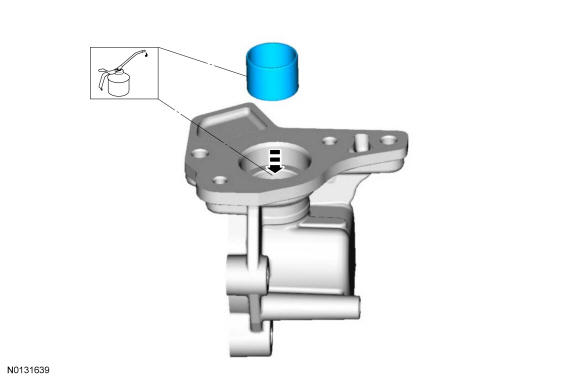
- 5.NOTE: Apply clean Motorcraft® SAE 5W-30 Premium Synthetic Blend Motor Oil (US); Motorcraft® SAE 5W-30 Super Premium Motor Oil (Canada) to the fuel injection pump tappet and to the fuel injection pump cover bore.
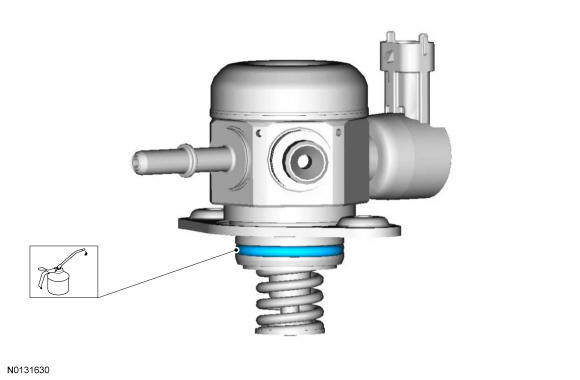
- 6.NOTE: Apply clean Motorcraft® SAE 5W-30 Premium Synthetic Blend Motor Oil (US); Motorcraft® SAE 5W-30 Super Premium Motor Oil (Canada) to the new fuel injection pump O-ring seal.NOTE: Make sure that a new fuel injection pump O-ring seal 9E583 is installed.
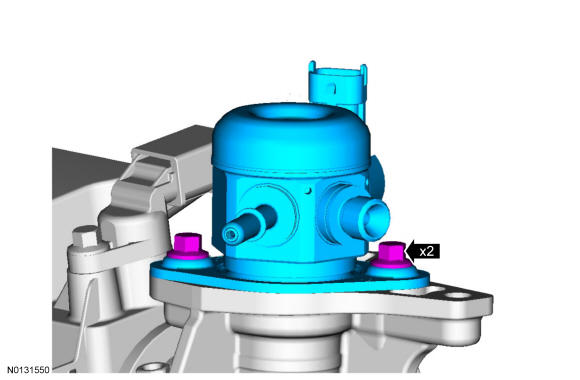
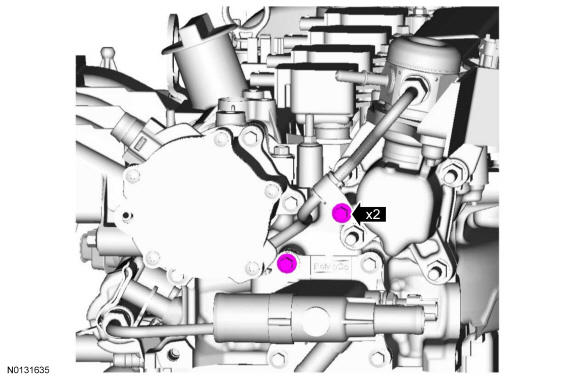
- 7.NOTE: Make sure that new fuel injection pump bolts W500414 are installed.
Install the fuel injection pump and loosely install 2 new fuel injection pump bolts. Alternately tighten each bolt one complete revolution until seated. Tighten the 2 fuel injection pump bolts in the following 2 stages.
- Stage 1: 5 Nm (44 lb-in).
- Stage 2: 55 degrees.
- 10.
-
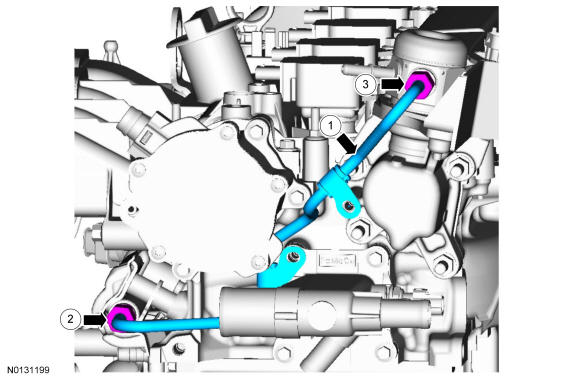
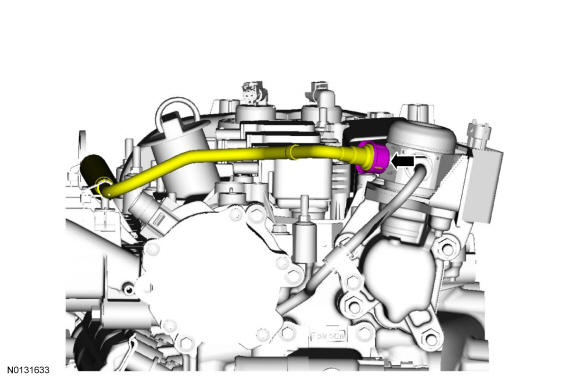
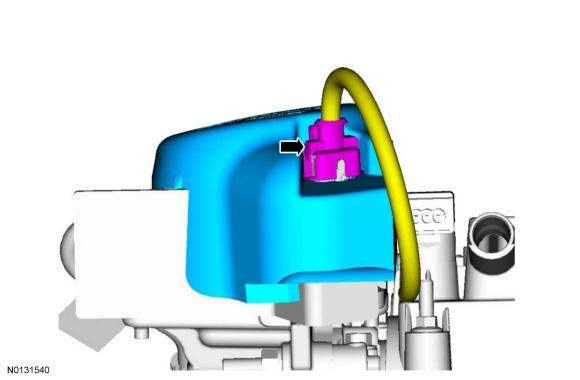
NOTE: Make sure that a new high pressure fuel tube 9J323 is installed.
- Hand tighten the high pressure fuel tube-to-fuel rail flare nut.
- Hand tighten the high pressure fuel tube-to-fuel injection pump flare nut.
-
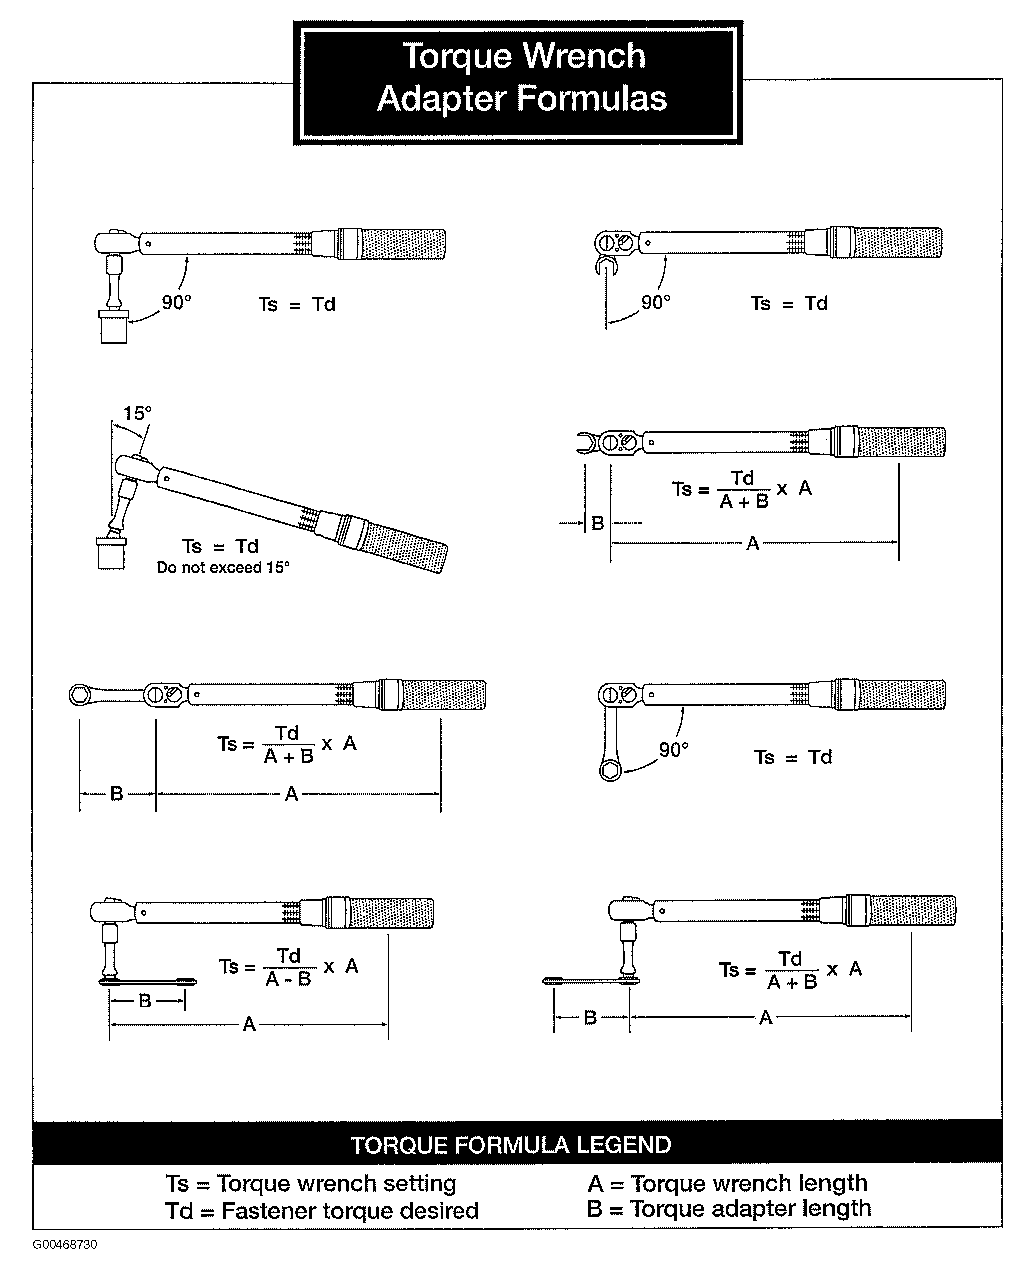
- 12.NOTE: Calculate the correct torque wrench setting for the following torque. Refer to the Torque Wrench Adapter Formulas in Fig 1
Tighten the 2 high pressure fuel tube flare nuts in the following 2 stages.
- Stage 1: Using a torque adapter, 15 Nm (133 lb-in).
- Stage 2: 30 degrees.

- 15.
Install the ACL outlet pipe. REFER to Intake Air Distribution and Filtering .
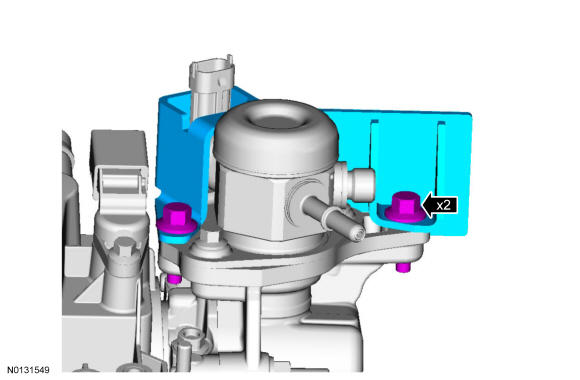
- 16.NOTE: Use care when installing the fuel injection pump noise insulator. Spreading the openings will aid in installing the fuel injection pump noise insulator and reduce the risk of damage.
- 17.
Connect the battery ground cable. REFER to Battery, Mounting and Cables .
- 18.
Pressurize the fuel system. REFER to Fuel System - General Information .