Removal And Installation: Turbocharger: Removal
WARNING: This page is about a different variant/trim than selected.
WARNING:
Before beginning any service procedure in this service information, refer to SAFETY WARNINGS
NOTE:
Whenever turbocharger air intake system components are removed, always cover open ports to protect from debris. It is important that no foreign material enter the system. The turbocharger compressor vanes are susceptible to damage from even small particles. All components should be inspected and cleaned, if necessary, prior to installation or reassembly.
NOTE:
The turbocharger wastegate actuator locknuts are not adjustable. Do not attempt to adjust the wastegate actuator locknuts or engine damage may occur.
NOTE:
Do not disassemble the turbocharger. Doing so may cause turbocharger or engine damage to occur.
- 1.
With the vehicle in NEUTRAL, position it on a hoist. REFER to Jacking and Lifting , Lifting Points.
- 3.
Remove the catalytic converter - 2.0L GTDI. REFER to Exhaust System .
- 4.
Remove the lower CAC inlet tube and the turbocharger inlet pipe. REFER to Intake Air Distribution and Filtering .
- 5.
Drain cooling system. REFER to Engine Cooling .
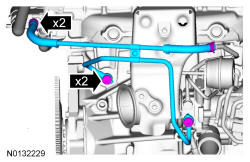
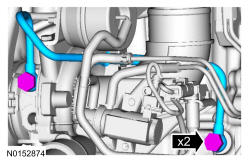
- 6.NOTE: Install new linked washers.
Remove the water outlet tube and water inlet hose assembly and discard the linked washers.
- Tighten to 28 Nm (21 lb-ft).
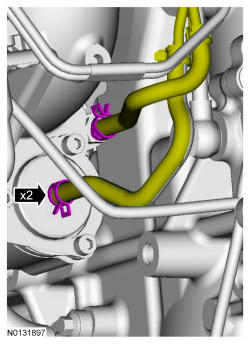
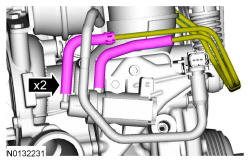
- 8.NOTE: Install 2 new turbocharger oil feed pipe sealing washers.
Remove the turbocharger oil feed pipe and discard the 2 turbocharger oil feed pipe sealing washers.
- Tighten to 25 Nm (18 lb-ft).
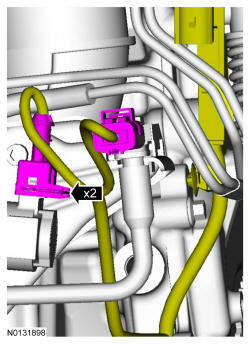
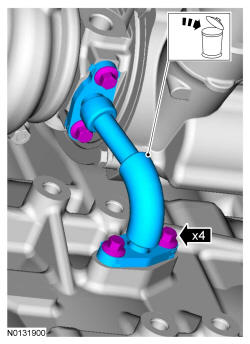
- 12.NOTE: Install a new turbocharger oil drain tube and gaskets. By not doing so, the turbocharger oil drain tube may leak and cause engine damage.NOTE: Install a new turbocharger oil drain tube and gaskets.
Remove and discard the turbocharger oil drain tube and gaskets.
- Tighten to 10 Nm (89 lb-in).